
Last year my first ever successful water marble was a 4 leaf clover design I kid you not. I followed Colette's tutorial for it on YouTube. You can find it HERE. I was stunned it actually turned out. I wanted to do another one this year and I didn't have as much success--where I wanted to have a four leaf clover design instead I got a lot of regular 3 leaf shamrocks BUT it really did turn out well!


Look how great Thumbie turned out??? He's my fave of all of them!


Here's my whole hand, it's pretty orangey looking but I took pics late at night

Here are some step by steps. But first of all you should watch Colette's tutorial, it's what inspired me last year. I do things a lot differently than Colette. First of all I use a votive candle holder and not a cup. I have never, ever, ever, ever, ever, ever, EVER gotten polish to spread out completely in a cup. In a votive glass it happens every time. If you don't have a votive candle holder use a shot glass. Second of all I use distilled water. I have never had good results ever with filtered water, but distilled water works for me. I also tend to have my water on the colder side. Room temperature in Wisconsin is not warm let me just tell you that right now lol!
Okay here we go:
First build your bullseye, you don't need a lot of rings for this marble

Once you have your bullseye done you want to start in the middle of your design. Start from the right outside middle and draw into the center, use a light touch and wipe your stick off. Do the same from the left out middle drawing into the center and wipe off your stick

This is how it should look. Notice I have what looks like 3 petals in the middle--I have no idea how it happened, when you marble you just go with the flow.
Next you do the same but this time going from top and bottom. From the top middle draw into the center and wipe your stick. Repeat from the bottom middle drawing up to the center and wipe your stick.

You do this by taking your orange wood stick and taking the point down into the center where the petals touch in the middle. You'll have to repeat this process a couple of times to shrink your design. Remember to wipe your stick off each time you dunk in to shrink your petals
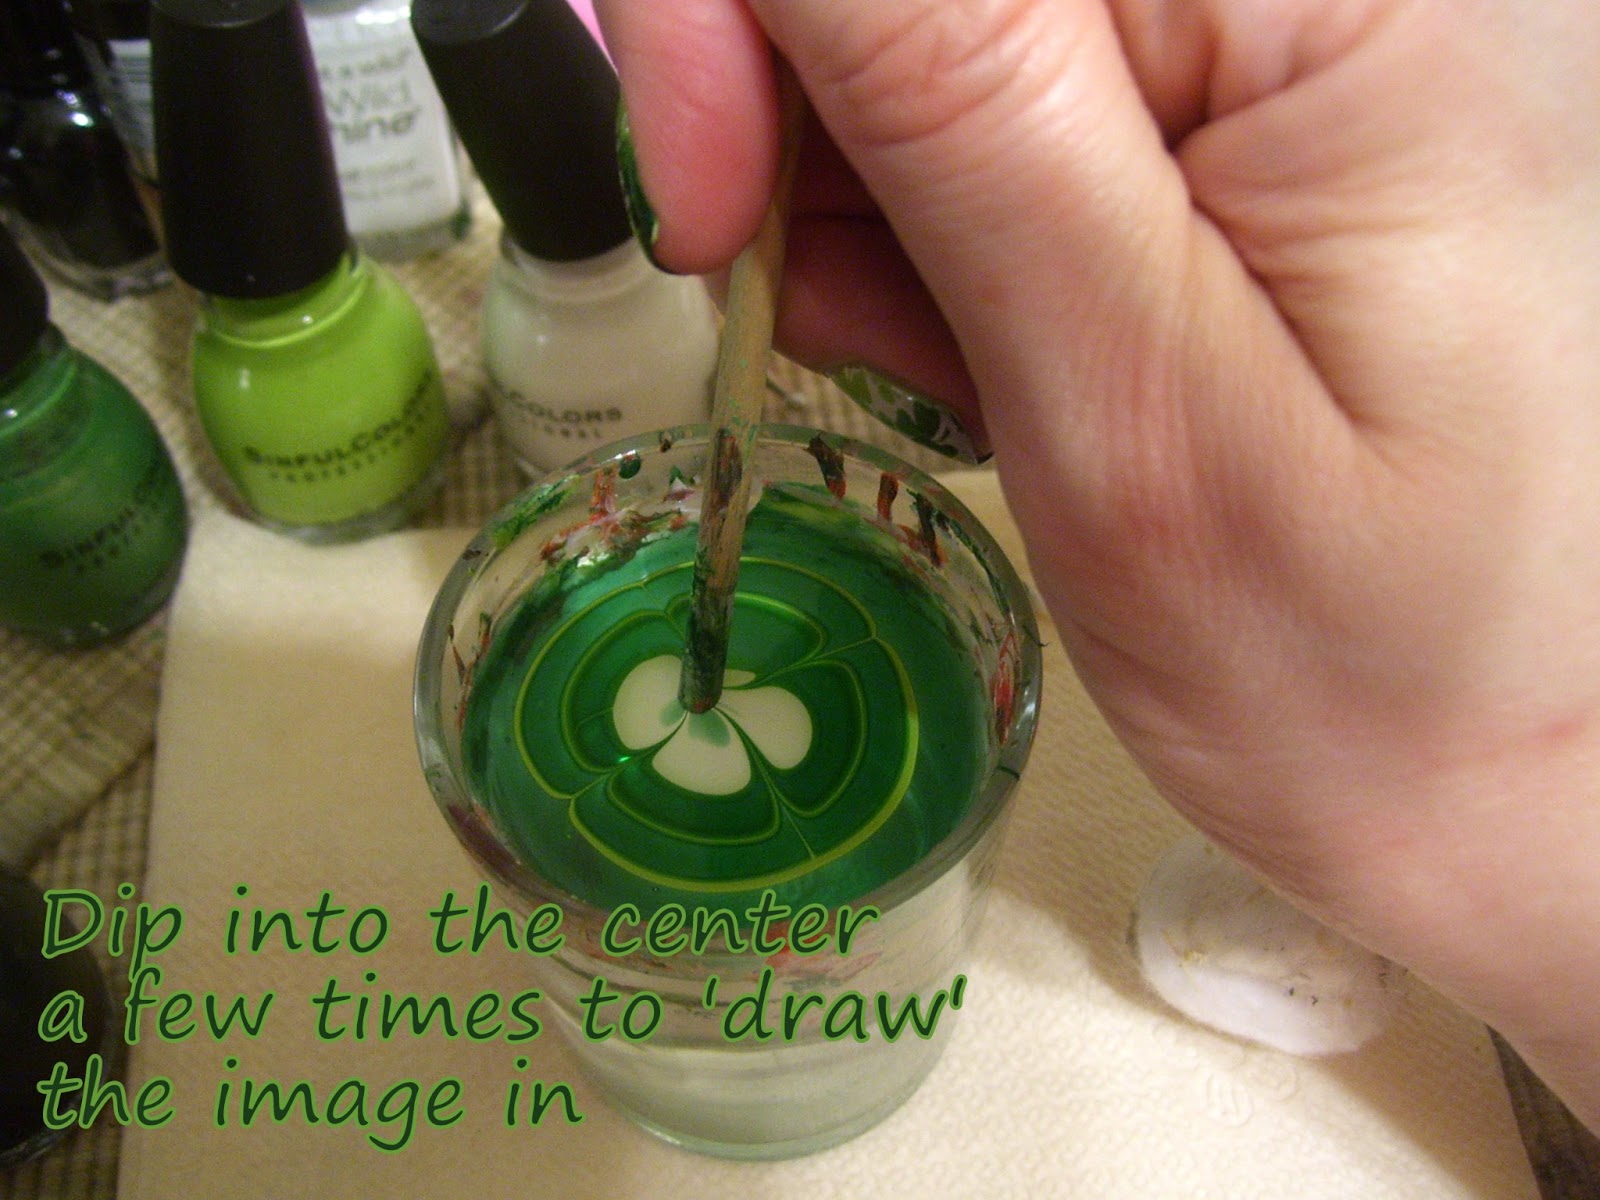


The more you dip in the more of the polish from the center you lose

I did manage to get 4 leaves on my right thumbie when I was doing this tutorial

I hope this has helped everyone. I really think you should give it a try. It really is a lot easier than it might seem.
I've entered my water marble contest in my first ever non stamping contest over at Set In Lacquer. She's having a great contest that's non stamping so please CHECK IT OUT and enter!!! If you follow her on FB you will have already seen my entry lol!
As always, thanks so much for stopping by! I appreciate all your comments and hope you all have a great day!
OH! I almost forgot! This is what last year's looked like--I like this year's better what about you?

Yes yes yes!!! I love this year's marble better too!!!! You got it so perfect!!!
ReplyDelete(and I totaly teared at the first part of your post...♥)
im loving this, i think it looks incredible and abstract but you can still easily identify what its supposed to be!
ReplyDeleteAWESOME POSSUM. Way to rock patty's day!
ReplyDeleteAbsolutely gorgeous!! I haven't even mastered a normal water marble let alone something this amazing!!!!
ReplyDeleteWow, this mani is amazing!
ReplyDeleteGreat job!!! I love this design ;)
ReplyDeleteOh my gosh Laurie! This is absolutely amazing.
ReplyDeleteThanks Everyone!! I've been having such a fun time with green's this week!
ReplyDeleteLove this! Thanks for the pointers! :)
ReplyDeleteWhoa! Dang girl, that is impressive! Great job!
ReplyDeleteGORGEOUS!!!
ReplyDelete